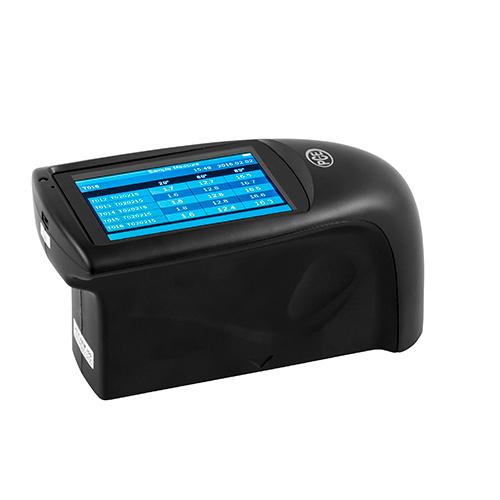
PCE-PGM 100 - Gross meter with angles 20° 60° 85°
| Specifications | |
| Measuring angle | 20° / 60° / 85° |
| Screen | Touch 3.5'' TFT, 320x480 |
| Standards |
ISO 2813 GB/T 9754 ASTM D 523 ASTM D 2457 |
| Measurement surface |
20° : 10 x 10 mm / 0.4 x 0.4 in 60° : 9 x 15 mm / 0.4 x 0.6 in 85° : 5 x 36 mm / 0.2 x 1.4 in |
| Measurement range |
20° : 0 ... 1000 GU 60° : 0 ... 1000 GU 85° : 0 ... 160 GU |
| Reading | 0.1 GU |
| Repeatability |
Range 0 ... 10 GU: ±0.1 GU Range 10 ... 100 GU: ±0.2 GU Range 100 ... 1000 GU: ±0.2 GU (%) |
| Reproducibility |
Range 0 ... 10 GU: ±0.2 GU Range 10 ... 100 GU: ±0.5 GU Range 100 ... 1000 GU: ±0.5 GU (%) |
| Chromaticity | Meets CIE 1931 (2°) under a CIE C light source |
| Measurement accuracy | ±1.5 / ±1.5% |
| Measurement time | 0.5 second |
| Dimensions | 160 x 75 x 90 mm / 6.3 x 3 x 3.5 in |
| Weight | 350 g < 1 lb |
| Menu language | English, Chinese |
| Power supply | Rechargeable Li-ion 3200 mAh battery |
| Outputs | USB / RS-232 |
| Memory | Base count: 1000 |
| Operating temperature | 0 ... 40°C / 32 ... 104°F |
| Storage temperature | -20 ... 50°C / -4 ... 122°F |
| Relative humidity | < 85% RH (non-condensing) |
The PCE-PGM 100 gloss meter works with measuring geometries of 20°, 60° and 85°, using the principle of reflection. During the measurement, the gloss meter emits a beam of light, part of which is reflected by the surface to be measured, and then the measurement in GU is displayed on the 3.5'' TFT screen.
Gloss testing is usually performed during the manufacture of products that must meet requirements based on high quality standards.
The user has the possibility to store the measurements he receives directly in the built-in memory of 1000 entries.
- 3.5" TFT
- Calibration plate included
- Short measurement time
- Evaluation software
1 x Rechargeable Li-ion Battery
1 x USB Cable
1 x Calibration plate
1 x Evaluation Software (on CD-ROM)
1 x Instruction Manual


