


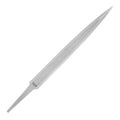


The micrometer, together with the caliper, is the most widely used precision measuring instrument. It is widely used in mechanical engineering. Its operating principle is such that the measuring force is always the same. This is achieved by the ratchet, which turns freely once the measuring force reaches the limit set by the manufacturer. For this reason, the micrometer is a more reliable measuring instrument than the caliper.

Micrometers are either digital or analog. They are then divided into outside micrometers (for external measurements, e.g. shafts) and inside micrometers, or bore micrometers (e.g. cylinders). In addition, there is a very large variety for special measurements with various types of anvils such as discs, points, balls, tips, and many others. An important category of micrometers is also the 3-point type for high-accuracy measurements in cylinders and bores with great ease and speed. Finally, there are micrometer heads without the "frame", ideal for custom-built and specialized measuring needs.
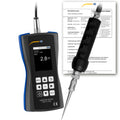
How to measure with the micrometer (0.01mm)
On 0.01mm micrometers, the measurement is taken as shown in the image below.

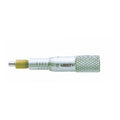
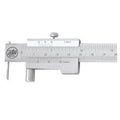
Micrometer with vernier (one vernier) (0.001mm)
The vernier scale (3) in the diagram makes measurement to 0.001mm possible.
As with calipers, we read the vernier to measure the last digit (in this case the small μm) by seeing which vernier line coincides with the 0.01mm line.

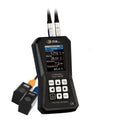
Micrometers with counter (0.001mm)

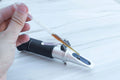
Micrometer expansion due to heat transfer from a bare hand.

The graph above shows the expansion of micrometers of different sizes when held with a bare hand. Heat transfer from the hand to the micrometer body can cause a fairly large error due to expansion. For this reason, some micrometers have a plastic "handle". Otherwise, the use of gloves is recommended.
Error due to the support direction

The table above shows the errors that occur when the micrometer is zeroed using the first support method (below and in the middle) but measurements are then taken using a different support method. Therefore, ideally the same support method should be used during measurement as the one used when zeroing the instrument.
Abbe's principle

The Abbe principle states that maximum accuracy is achieved when the graduated measurement axis is the same as the measurement axis. This is because the angle "θ" of the moving jaw (of a caliper or a micrometer with jaws) causes the displacement "ε", which is not measured on the graduated measurement axis.
Measurement errors with a micrometer
Various factors can cause errors during measurement.
⚠️
Error in the micrometer screw.
Flatness & parallelism error of the anvils.
Excessive measuring force.
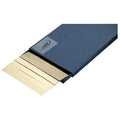
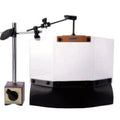
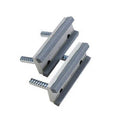
Checking micrometer parallelism with optical flats
The parallelism of the anvils can be measured with optical flats. First, we bring the flat into contact with one anvil and then close with the other anvil using the normal measuring force. Then we count how many lines are visible. Each line represents a height difference of half a wavelength (0.32μm for red lines). In the example below, the parallelism is approximately 1μm. 0.32μm x 3 = 0.96μm.

Checking micrometer flatness with optical flats
The flatness of the anvils can also be measured with optical flats by counting the number of red lines as seen on the anvil under white light. Each line represents a height difference of half a wavelength (0.32μm for red lines).

General information on micrometer use
- Careful selection of type, range, resolution, etc., depending on the required application.
- Allow the micrometer and the part to be measured to reach room temperature.
- View the measurement axis and the graduation in a straight line to avoid parallax error.

- Wipe the two measuring anvils by passing a piece of paper between them, tightening them, and then gently pulling the paper out.
- Use the constant measuring force mechanism correctly.
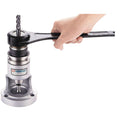
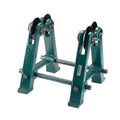
- When using a micrometer stand, hold it at the center of the frame. Do not overtighten.

- Try to avoid impacts with other objects or dropping the micrometer. Also, do not rotate the ratchet with excessive force. If you believe that an instrument has been mishandled, you can always check it with gauge blocks and optical flats.
Notes on storage
Store in a ventilated area with low humidity.
Avoid areas with a lot of dust.
When storing it, make sure to leave a gap of about 0.1-1mm between the anvils.
Do not store the micrometer in a stand.